
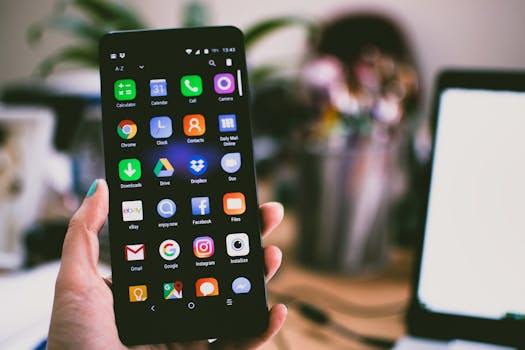
We spend hours organizing our Home Screens, picking the perfect wallpaper, and deciding which widgets deserve prime real estate. But there is a section in your iPhone's Settings app that most people scroll right past, assuming it doesn't apply to them. That section is Accessibility.
While these features are designed to help people with vision, hearing, or motor impairments, Apple has engineered them so well that they have essentially become "superuser" shortcuts. If you aren't digging into this menu, you are missing out on some of the most powerful customization tools iOS has to offer.
Whether you want to turn the back of your phone into a secret button, turn your device into a white noise machine, or give yourself bionic hearing, here are the accessibility tricks you didn’t know you needed until now.
1. Back Tap: The Secret "Magic Button"
Did you know the Apple logo on the back of your phone isn’t just for branding? With a feature called Back Tap, the entire back of your iPhone becomes a touch-sensitive button. This is easily one of the coolest party tricks in the iOS arsenal, but it is also incredibly practical for daily use.
You can map two different actions to the back of your phone: a double tap and a triple tap. This means you can trigger actions without even touching your screen.
Real-world examples of how to use this:
- The Screenshot Snap: Set a double tap to take a screenshot. No more fumbling with the volume and power buttons at the same time.
- The Flashlight Toggle: Set a triple tap to toggle your flashlight. This is a lifesaver when you are carrying groceries and trying to unlock your front door in the dark.
- Instant Shazam: Create a Shortcut that runs Shazam and map it to a tap. Now you can identify songs instantly without unlocking your phone.
Pro Tip: If you use a thick, rugged case, you might need to tap a little harder, but the iPhone’s accelerometer is sensitive enough that it works through almost all standard cases.
How to set it up:
- Go to Settings.
- Tap Accessibility.
- Select Touch.
- Scroll to the very bottom and choose Back Tap.
- Assign actions to Double Tap and Triple Tap.
2. Background Sounds: Your Built-in Focus Machine
In the age of open-plan offices and noisy coffee shops, staying focused is a challenge. Many of us pay for subscriptions to apps like Calm or keep a 10-hour YouTube video of "Rain Sounds" playing to drown out the world. Apple actually built a high-quality white noise machine right into your operating system, and it sounds fantastic.
This feature is called Background Sounds. It minimizes distractions and helps you focus, calm down, or rest. The best part? It can play underneath other media. This means you can listen to a podcast or music while having the subtle sound of rain or the ocean filling in the silence behind it.
Why you’ll love it:
- Better Sleep: Use the "Dark Noise" setting to help you drift off without needing a separate machine on your nightstand.
- Deep Work: The "Stream" sound is excellent for drowning out chatter in a busy environment without being distracting itself.
How to set it up:
- Go to Settings > Accessibility.
- Tap Audio & Visual.
- Tap Background Sounds and toggle it on.
- Choose your sound (Balanced Noise, Bright Noise, Dark Noise, Ocean, Rain, or Stream).
Quick Access Trick: You don't want to dig through menus every time you need to focus. Go to Settings > Control Center and add the Hearing icon (it looks like an ear). Now, you can swipe down from the top right of your screen, tap the ear, and toggle your background sounds instantly.
3. Magnifier: Superhuman Vision in Your Pocket
Have you ever been in a dimly lit restaurant, squinting at a menu where the font seems to be size 6? Or perhaps you’re trying to read a serial number on the back of your Wi-Fi router? Most people instinctively open their Camera app and try to zoom in. The Camera app is great for photos, but it’s terrible for reading text.
Enter the Magnifier. This is a dedicated utility that uses your iPhone’s camera but optimizes it for clarity, contrast, and zoom. It is essentially a digital magnifying glass on steroids.
The Magnifier allows you to zoom in much further than the standard camera. It also lets you turn on the flashlight continuously while zooming, adjust the contrast, and apply color filters (like high-contrast black and white) to make text pop out against the background.
Real-world examples:
- The Splinter Surgery: If you get a splinter, the Magnifier’s zoom combined with the flashlight makes removal much easier.
- Product Labels: Reading the tiny ingredients list on a bottle of medication.
- Lost Items: Looking for an earring back that fell into a high-pile rug.
How to set it up:
The Magnifier is an app, but it might be hidden in your App Library. Search for "Magnifier" and drag it to your Home Screen. For even faster access, go to Settings > Control Center and add the Magnifier icon there so it's always one swipe away.
4. Spoken Content: Turn Any Article into a Podcast
We all have a list of articles "saved for later" that we never actually read because we don't have the time to sit and stare at a screen. Spoken Content solves this by allowing Siri to read whatever is on your screen out loud to you.
This isn't the robotic, clunky text-to-speech of the early 2000s. The modern Siri voices are incredibly natural. This feature transforms your web browsing, Kindle books, or long emails into a personal podcast that you can listen to while driving, cooking dinner, or walking the dog.
How to use it effectively:
- Open a long article in Safari.
- Tap the "aA" button in the address bar and select "Show Reader" (this strips away ads for a cleaner reading experience).
- Swipe down with two fingers from the very top of the screen to activate the reader.
You will get a small pop-up controller that lets you speed up the reading (1.5x speed is the sweet spot for many) or pause/rewind. It keeps reading even if you lock your phone and put it in your pocket.
How to set it up:
- Go to Settings > Accessibility.
- Tap Spoken Content.
- Toggle on Speak Screen.
- Tap Voices to download high-quality versions of Siri (look for "Premium" or "Enhanced" voices for the most natural sound).
5. Per-App Settings: Customizing the Uncustomizable
For years, iPhone users complained that iOS was too rigid. If you increased the text size, it increased it everywhere, which might look great in your Messages app but break the layout of your Instagram feed.
Apple solved this with a hidden menu called Per-App Settings. This allows you to create specific display rules for individual apps without changing the rest of your phone.
Creative ways to use this:
- Maps & Navigation: Set the text to Bold and Larger specifically for Google Maps or Apple Maps. This makes it much easier to glance at street names while your phone is mounted on your car dashboard.
- Reading Apps: Force "Smart Invert" on reading apps that don't have a good Dark Mode, saving your eyes at night.
- Social Media: If you find auto-playing videos on social media dizzying or distracting, you can reduce motion specifically for those apps.
How to set it up:
- Go to Settings > Accessibility.
- Scroll to the very bottom and tap Per-App Settings.
- Tap Add App and choose the app you want to customize.
- Tap the app name in the list and start tweaking!
Pro Tip: You can even customize your Home Screen here. If you want the text under your app icons to be bold but your messages to be normal, add "Home Screen" to this list.
Accessibility features are about more than just assistance; they are about adapting technology to fit your life, rather than the other way around. Take five minutes today to set up Back Tap or Background Sounds, and you’ll wonder how you ever used your iPhone without them.